
From accidental doorknob dents to electrical modifications, homeowners are bound to encounter drywall damage. Fortunately, most drywall repairs are simpler than you might think, especially when you have the right products and techniques.
This guide covers five essential drywall repairs that every homeowner should know how to tackle, along with professional-grade products that make the job easier and more durable.
- Small Dents and Holes
Whether it’s from a door swinging open too forcefully, rambunctious kids, or moving furniture, small dents and holes are some of the most common types of damage homeowners may face.
How to repair:
- Cut away any loose paper from the damaged area and lightly sand.
- Apply ample drywall compound to the damage and surrounding area.
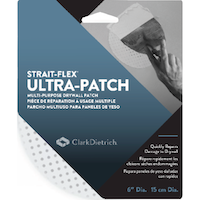
- Press a Strait-Flex Ultra-Patch into place over the damage (these 6-inch patches outperform metal patches and are suitable for holes up to three inches across). Smooth the excess mud with a drywall knife.
- Immediately apply a skim coat (a light coat of compound, feathered out to the wall). Once dry, lightly sand and apply a second coat.
- After everything is dry, prime and paint.
- Miscuts Around Can Lights and Electrical Outlets
If you’re installing can lights or electrical outlets in your home, you’ll likely need to reinforce or touch up the cut edges of the drywall. Strait-Flex Perma-Patch is a multi-purpose patch imprinted with standard can light and receptacle patterns, so it can be easily cut to size for either need.

How to repair:
- Lightly sand the area to be repaired.
- Cut Perma-Patch to desired shape/size, following printed patterns.
- Apply ample drywall compound to the area to be repaired.
- Press Perma-Patch into place and wipe flat.
- Once dry, apply a second coat.
Pro tip: Because of its versatility, Perma-Patch is a great product to always keep on hand. But if you need to patch around only can lights or only outlets, Strait-Flex also makes a pre-cut Can-Patch and a pre-cut Outlet-Patch.
- Filling Holes of Relocated Can Lights and Electrical Outlets
Relocating lights or electrical outlets comes with one gaping problem: a large hole to be filled. Luckily, the versatility of Perma-Patch (see above) shines here too, patching holes up to five inches in diameter. For these repairs, keep the patch fully intact—no cutting necessary.
How to repair:
- Lightly sand the area to be repaired.
- Apply joint compound directly to the back of Perma-Patch, about a quarter-inch thick. This helps add rigidity to the patch once dry.
- Press into place, then immediately skim coat.
- Once dry, apply a second coat.
- Small Cracks and Stress Damage
Settling foundations, temperature changes, and normal building movement can create hairline cracks in drywall surfaces.
How to repair:
- Run a taping knife over the damage area to remove any loose plaster or debris.
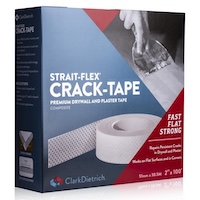
- Cut Strait-Flex Crack-Tape to size with scissors or utility knife.
- Apply a liberal amount of joint compound to the wall.
- Press into place, then immediately skim coat.
- Once dry, apply a second coat.
- Corner Finishing
There are several types of corner beads on the market—metal, paper-faced metal, vinyl, and composite. Here, we’ll cover the basic steps; for additional guidance, be sure to check out this in-depth list of recommended beads for every angle type and consult manufacturer guidelines for installation best practices.

The ultimate solution for high-traffic outside 90° corners, Strait-Flex Big-Stick is the easiest corner bead on the market to install and repair. It offers superior impact resistance and maintains straight lines even under heavy use.
How to install:
- Cut to size (subtracting half an inch from the wall height) using scissors or a utility knife. Cut the ends at 45º angles.
- Liberally apply drywall compound to the wall.
- Press Big-Stick into place. While the compound is wet, you can adjust the corner bead in place as needed to ensure it is straight.
- Wipe away excess mud with a drywall knife.
- Immediately apply a light skim coat.
- Once completely dry, apply a second coat and feather out to the wall for a smooth finish. Let dry completely before sanding lightly and painting.
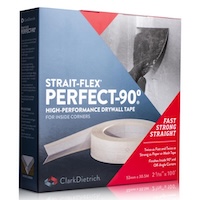
For inside 90º corners, Strait-Flex Perfect-90º™ offers consistently good results. Designed to create perfectly straight inside corners, it features a rigid spine for durability and paper edges for easy finishing.
How to install:
- Fold at the center crease with the print sides facing out.
- Liberally apply drywall compound to the wall.
- Press Perfect-90º into place. While the compound is wet, you can adjust the corner bead to ensure it is straight.
- Wipe away excess mud with a drywall knife, using extra pressure at the outer edges.
- Once completely dry, apply a final coat to the perforated edge only. No compound is needed over the finished area of the tape—it’s pre-treated to accept paint.
- Let dry completely before sanding lightly and painting.
Professional Results with the Right Products
By using professional-grade products specifically designed for each application, you’ll achieve results that match contractor-quality work while saving time and ensuring long-term durability. Remember that proper surface preparation and following manufacturer installation guidelines are essential for optimal results.
With these five repair techniques in your skillset, you’re prepared to handle the most common drywall challenges that arise in any home.