

Finishes inside 90° and off-angle corners
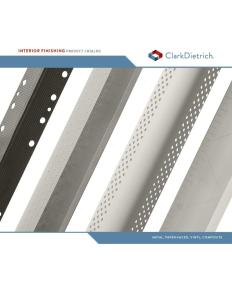
Pro-Flex300™ is a muddable, PVC-Free, flexible corner bead that adjusts to any angle to create perfect inside and outside 90° and off-angle corners.
Pro-Flex300™ features a reinforced paper backing which provides strength for durability and impact resistance. The heavy-weight, diamond punched paper provides maximum adhesion for an even lay-down of the paper edge and reduced edge cracking. Pro-Flex300™ is packaged in 100 ft. rolls that can be cut to the desired length in the field to minimize scrap loss.
- PVC-Free, the superior choice for green building projects.
- Memory-free hinge produces straight corners and perfect angles
- Smooth nose provides a square, low profile – drywall knives will not catch, snag or puncture center hinge
- Reinforced paper backing provides strength and embeds into compound to provide a superior bond to the drywall surface
- Diamond-punched paper edging provides maximum adhesion – no cracks, no call backs
- Paper surface is pretreated to accept paint, finishing compound is not required over the laminated area – uses the half the compound vs. standard corner bead
- Paper will not fuzz-up during finish sanding like paper and mesh tapes
- Installs with all-purpose joint compound. No special tools or fasteners are needed. Lightweight compound may be used to finish.
Applications:
- Great for vaulted, coffered and tray ceilings, bay windows.
- Outside corners where common gaps in drywall are present.
- Outside corners where a large fill or straightening is required, no back filling needed.
Product Data & Ordering Information
| Product code | Width | Length | Wholesale Case | |
|---|---|---|---|---|
| Rolls/Case Pack | Cases/Pallet | |||
| PF300-100 | 3" | 100' | 10 | 24 |
Installation
Make sure the surfaces of the corner are clean and smooth. Measure corner and subtract 1/2”.
- For accurate measuring of Pro-Flex300™ and less waste, feed roll through slot on top of box. Hook tape measure on the hole below.
- Fold Pro-Flex300™ in half with the print side facing out.
- For outside corners, fold more than the desired angle. For inside corners, fold less than desired angle.
- Most professionals prefer to cut the ends of Pro-Flex300™ at a 45º angle.
- Apply a liberal coat of all-purpose joint compound to both sides of the corner with a 4” or 5” taping knife.
- Press Pro-Flex300™ into the wet compound. Adjust, if necessary, to create a straight line.
- Wipe down tight with taping knife using a little additional pressure on the outer edges. Let dry completely over several hours or overnight.
- Apply a light skim coat of compound to the outer edges of Pro-Flex300™ with a 4” or 5” taping knife. No compound is required over the laminated area of Pro-Flex300™. Wipe down tight and smooth. Let dry completely over several hours or overnight.
- Apply the final coat of joint compound with a 6” or 8” taping knife. Feather the compound beyond previous coat. A very light coat of compound is all that’s needed. Using lightweight compound in this step makes sanding easier. Let dry completely over several hours or overnight.
- Sand lightly with 120 grit sandpaper. Pro-Flex300™ will not fuzz-up like paper or mesh tapes.
INSTRUCCIONES DE INSTALACIÓN
Asegúrese de que las superficies de la esquina estén limpias y lisas. Mida la esquina y reste 1/2".
- Para medir el Pro-Flex300™ con más precisión y menos desperdicio, inserte la cinta a través de la ranura en la parte superior de la caja. Enganche la cinta métrica en el agujero que está debajo.
- Doble el Pro-Flex300™ por la mitad con la cara impresa hacia fuera.
- Para esquinas externas, doble a un ángulo mayor al deseado. Para esquinas internas, doble a un ángulo menor al deseado.
- La mayoría de los profesionales prefieren cortar los extremos del Pro-Flex300™ a un ángulo de 45º.
- Aplique una capa generosa del compuesto multiusos para juntas en ambos lados de la esquina con una espátula de 4" o 5".
- Presione el Pro-Flex300™ sobre el compuesto húmedo. Si es necesario, ajuste para crear una línea recta.
- Raspe con la espátula para que quede al ras, usando un poco más de presión sobre los bordes externos. Permita que se seque completamente, por varias horas o durante la noche.
- Aplique una capa ligera del compuesto a los bordes exteriores del Pro-Flex300™ con una espátula de 4" o 5". No necesita aplicar compuesto sobre las áreas laminadas del Pro-Flex300. Raspe para que quede lisa y al ras. Permita que se seque completamente, por varias horas o durante la noche.
- Aplique la capa final del compuesto para juntas con una espátula de 6" o 8". Raspe el compuesto hasta cubrir completamente la capa anterior. Una capa muy ligera del compuesto es todo lo que necesita. Usar un compuesto más ligero en este paso, hace que sea más fácil de lijar. Permita que se seque completamente, por varias horas o durante la noche.
- Lije ligeramente con papel de lija grano 120. Pro-Flex300 no hace pelusa como sucede con las cintas de papel o malla.
Code Approvals & Performance Standards
- ASTM C1047 Standard Specification for Accessories for Gypsum Wallboard and Gypsum Veneer Base
Storage:
All stored materials shall be kept dry. Materials shall be stacked off the ground, supported on a level platform, and protected from weather and moisture.
Product Submittal Sheets
Click the below Product Code to view Submittal/Tech Datasheet.
| Product Code | Description |
|---|---|
| PF300-100 | Strait-Flex® Pro-Flex300 |
ClarkDietrich SubmittalPro®
Submittal sheets for the exact product you're looking for can be created by using ClarkDietrich's SubmittalPro® Product Submittal System.
- Contact ClarkDietrich Technical Services at 888-437-3244 for any questions about creating product submittals or using SubmittalPro.


